DOS Game Club Podcast Participant Guide
Introduction
This guide is intended for people who are attending a recording session of one of our DOS Game Club podcast episodes. It contains some basic tips and instructions on how this thing works, in order to make the experience as smooth as possible and to ensure we get the best possible results in the end.
How it works
In order to create a DGC podcast episode, each participant goes through the following procedure:
- Read the notes document that is shared before the recording date. Feel free to add anything you'd like to bring up during the podcast.
- Have some software to record your local microphone signal. Any audio recorder will work, but if you don't have something ready we can recommend Audacity. It's free, easy to use and runs on a variety of systems.
- Find a suitable recording spot. Preferably a location where it's quiet and you're comfortable.
- We use Jitsi to talk to eachother, which is a free & open-source web-based conferencing tool. It doesn't require an account or anything, but it is advised to use an up-to-date modern web browser. On the communicated date / time, simply click the Jitsi-link you'll receive to join the call.
- After everyone's joined the call, everyone starts their local audio recording.
- We talk about the game for about 2 hours. We don't have a strict length we're aiming for, but this is typically what we end up with.
- After the call is over, stop your audio recording. Then export the file and send it to our host, Martijn.
That's it, pretty much! Martijn receives the audio recordings from all participants and turns it into an episode. This takes typically 1-2 weeks to mix, edit and upload.
The notes document
For each episode, we prepare some notes. They are mostly bullet points for subjects we'd like to talk about, such as describing the game itself, how it got made, the reviews it got at the time, any ports or sequels that were released and how to get and play the game nowadays.
We use Google Docs for our notes document and allow anyone with a link to the document to edit it, so you don't have to log in with an account in order to participate.
Typically the document is sent a few days in advance of the recording date, so there is some time to gather your thoughts. Please feel encouraged to add anything you'd like to mention to the document, and also correct any mistakes that others might have put in.
Recording tips
The recording you make locally of your voice is the most important part of the process. This is the actual audio that will eventually go into the podcast. Here are some tips to make it sound the best you can.
Recording levels
The level at which you record can make or break the result. In general, recording at too low a level is preferable to recording at too high a level. Recording at and above maximum level will result in clipping, which is a form of irrepairable damage to the signal, so we definitely want to avoid that.
A good way to set an appropriate level is to make a loud sound, such as bursting out laughing. Set the gain at such a level that during these loud peaks, it never goes over about 70% to 80% of the total scale. This way you know you'll be safe during the actual recording.
Recording at too low a level is not ideal, but much less of a problem because we can simply boost the audio afterwards to bring the level up. This might introduce some unwanted noise, but filtering this out is an option and even without getting rid of it completely, a little background noise is definitely better than the damaged sound of clipped audio.
Recording settings
In your recording software, it's important to set it to record the correct microphone. This might seem obvious, but it's easy to overlook and will result in a poor sounding recording, or even no sound at all. It's advised to record only 1 audio channel, otherwise known as mono. This helps to reduce the file size and since you're only recording your voice, additional channels offer no real benefit.
If you're using Audacity, these settings appear near the top of the application (screenshot from Mac version, other versions might appear slightly different):
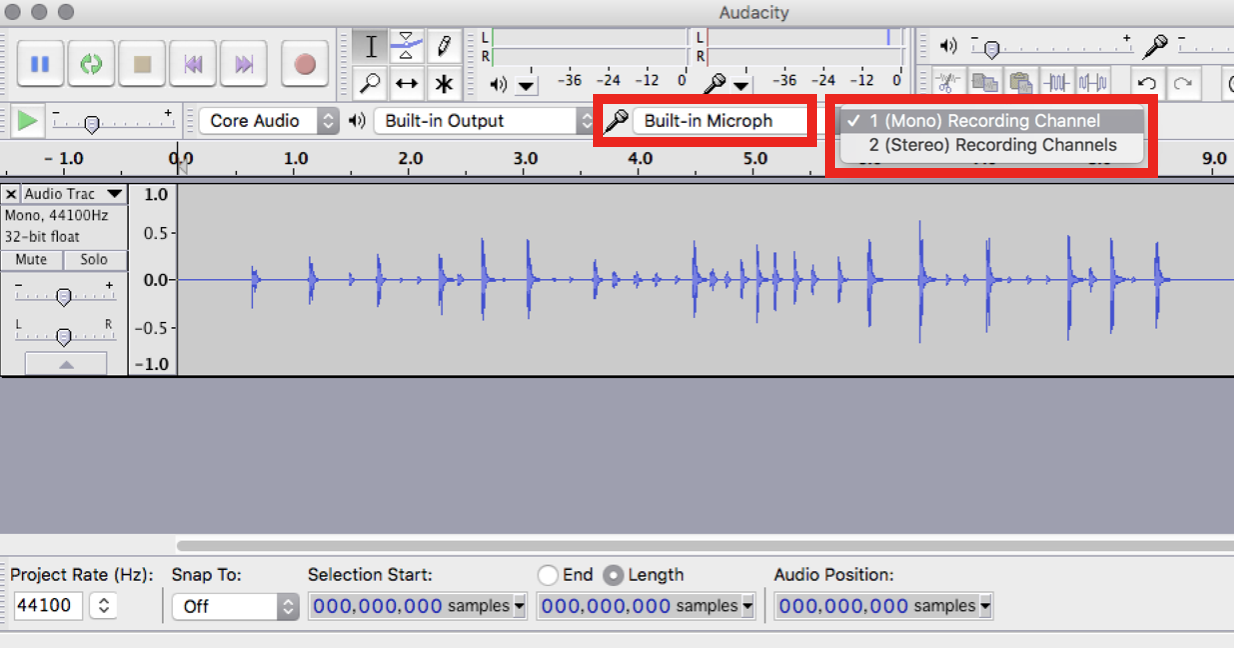
Other relevant settings might be the sample rate, of which 44.1 khz is a good value. Lower values result in poorer sounding audio, while higher values increase file size without offering any real benefit. If asked for a bit depth or resolution, a value of 16 bit is sufficient.
To summarize:
- Input: the actual mic you're talking into
- Channels: 1 (mono)
- Sample rate: 44.1 khz
- Bit depth / resolution: 16 bit
- Any additional settings: highest quality
Environment
One of the biggest factors in getting a good sounding recording is the room in which it's made. For best possible results, make sure the room is quiet and has no loud background noises. If you can't prevent any background noises, position yourself in such a way that you and the microphone are as far away as possible from the source of the noise.
Another factor is the acoustics of the room. In general, any reasonably furbished room will sound fine. The more stuff there is in the room, the more the sound is absorbed, improving the acoustics. Especially fluffy things like rugs and curtains really help. Don't go recording in the bathroom.
Lastly, make sure you're recording environment is comfortable. These sessions can sometimes last up to two hours or more, so being in a bad position is not advisable.
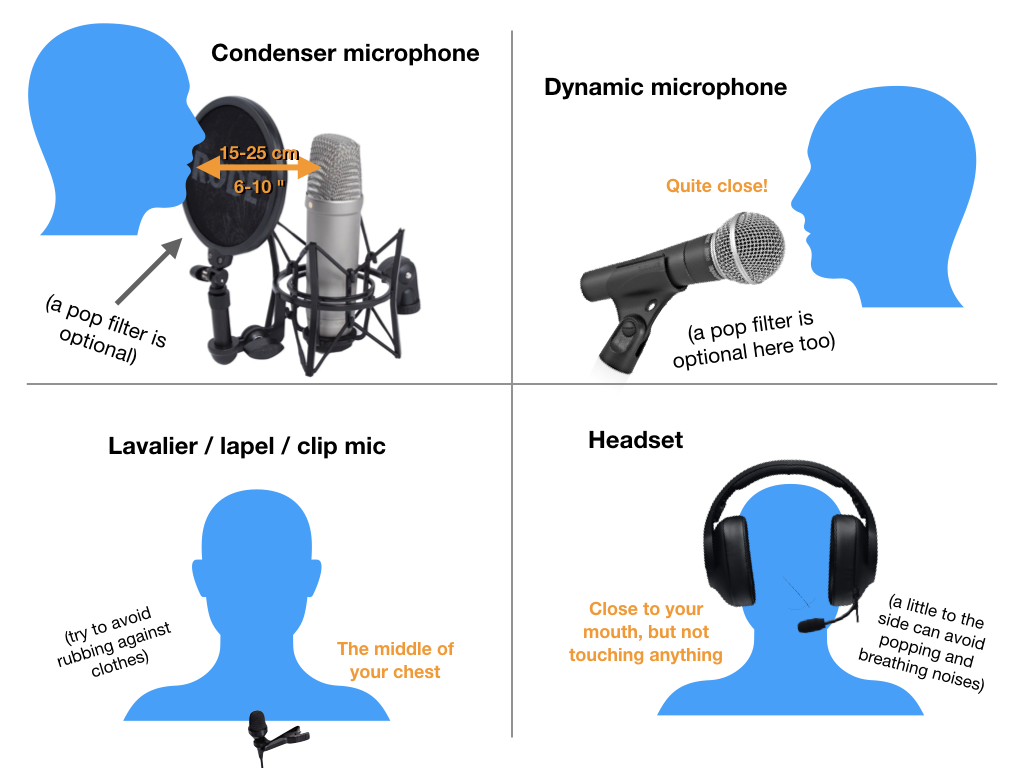
Microphone placement
The way you place your microphone has a big impact on how well your recording sounds, but what you should do exactly depends on the type of microphone you're using. Here's an image to show you some of the different options:
Headphones
During recording it's important that your microphone only picks up your voice and nothing else, so using headphones is key. But even when using them, sound can sometimes leak onto the microphone. Please try preventing this, by not having your volume up too loud and wearing your headphones tightly on both of your ears.
If at all possible, try to use headphones of a "closed" design, which means they leak significantly less than those of an "open" design. In-ears can also be fine. Please don't buy special headphones just for this podcast, just use the best thing you have laying around in a sensible way.
Sending your audio
After the call has concluded, the next step is to save your recording to an audio file and send it to Martijn for editing.
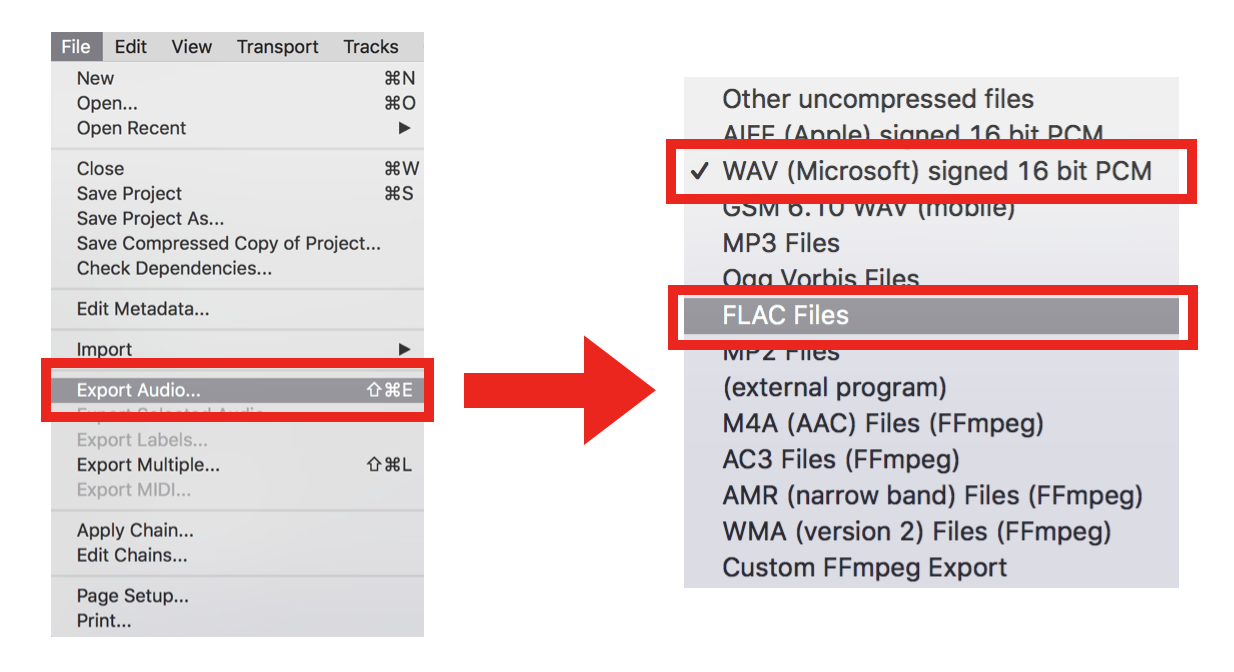
If you're using Audacity, the option to save your audio is called Export audio, found in the File menu. There is also a "save" option, but that only saves your settings to reopen them later in Audacity. It doesn't save the actual audio you recorded.
File type
When exporting your audio, you can typically choose from various file formats. The following formats are good choices, in other of preference:
- FLAC offers the best possible quality at a relatively small file size, making it the most preferred option.
- WAV offers the same great quality FLAC does, but results in a much larger file size. If FLAC is not available for you, but you are able to send very large files over the internet, this option is preffered. You can reduce the file size somewhat by compressing the file before sending, for example using Zip or Rar.
- Ogg Vorbis offers worse quality audio compared to FLAC or WAV, but when set at the highest possible bitrate, it's still very usable. Files encoded as Ogg are generally very small, so if sending large files over the internet is a concern to you, this might be a good option.
- MP3 sounds slightly worse than all the above options and results in roughly similar file sizes as Ogg Vorbis. Choose this if none of the above options work for you.
If asked for any additional settings, the following still applies:
- Channels: 1 (mono)
- Sample rate: 44.1 khz
- Bit depth / resolution: 16 bit
- Any additional settings: highest quality
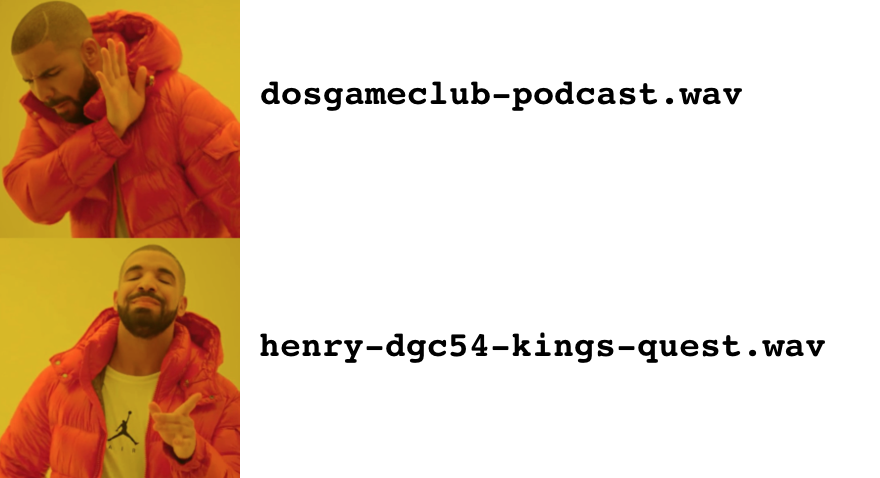
File name
Please make sure the file name includes at least the following:
- Your name
- The episode you were on (either the number, or the game, or both)
Actually sending it over
Once you've got your file all ready to go, it's time to send it over to Martijn for editing. You can use whatever means are available to you, as long as we can download the file. For example Google Drive, Dropbox, your own web host, etc. If it works for you, it works for us.
Be aware the resulting audio file can be quite large, depending on the file format and settings you've chosen. If you don't have a way to send us your file, we can recommend WeTransfer. This is a file transfer service and allows for sending files up to 2 GB for free.
Social media
DGC is mostly active on Mastodon, where we regularly post about new episodes once they're available. We also have a presence on Twitter. If you are active on either Mastodon or Twitter and wish to be tagged in our tweets, please share your handle with us beforehand.
If you're active on other social media, please help to spread the word about DGC by posting a link to us once the new episode is out. It's much appreciated!
Too long; didn't read
Ok, this document got a lot longer than we had anticipated, so we don't blame you for skipping over a few things, haha. If you just want a quick overview of the most important bits, they are:
- We use Jitsi to talk to each other. It's a web-based conferencing tool which doesn't require an account or anything and should work in all modern browsers.
- Record your voice locally during the call. You can use any sound recording software for that. If you don't have anything, we recommend Audacity.
- Good settings for recording / saving your audio:
- Channels: 1 (mono)
- Sample rate: 44.1 khz
- Bit depth / resolution: 16 bit
- Any additional settings: highest quality
- Audio file formats in order of preference: FLAC, WAV, Ogg Vorbis, MP3.
- Include your name and the episode in the file name.
- Send your file using any method you like (Dropbox, Google Drive, whatever). If you don't know how to send it, you can use WeTransfer.
That's it!
Thank you for taking part. If you've got any questions or comments, please don't hesitate to reach out.
Scroll to the top